Milestone 4
System Concept
TrekGlance employs Augmented Reality in bringing users information at a glance. In a National Park or National Forest setting, TrekGlance utilizes location services and displays information about various paths in the park or forest. TrekGlance glasses have gps and can detect the direction a user is facing. The motivation behind the system is in creating a way for users to remain immersed in the environment, while being able to access information. Similar to how the mobile phone allowed users to access information on the go, TrekGlance aims to allow users to access information while remaining engaged in their activity.
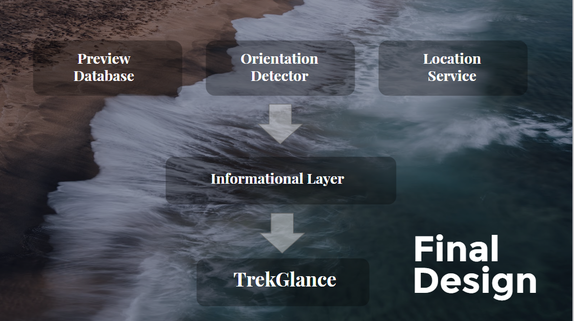
An overview of the system's architecture
TrekGlance makes use of the following three elements to form the informational layer of our system:
- Preview database - stores the pictures and videos that pop up when users want to preview an upcoming path
- Location service - A location service (such as GPS) allows the system to detect the user’s location in the area and display information based on that location
- Orientation detector - detects the movement of the user and triggers certain information based on the movement
Demo Goals
The goals of the demo was to replicate the behavioral aspects of using our device and get feedback on the socio-cultural aspects of our system. In particular, we wanted to test whether the form factor, glasses, along with how information was accessed and displayed would be acceptable. While we were creating our prototype and demo, we had the failures of Google Glass in mind. Namely, wearing glasses had social risks of looking different. In the context of hiking, where there is usually more privacy and there is a natural motivation to wear eye protection, we were wondering if these concerns still remained true or would there be additional worries to factor in.
Demo Outline
Below is the list of materials we will need and the script that goes along our demo. The script will be require a narrator, an actor, and a scene hand (played by Jason, Sina, and Diane respectively).
Introduction: Since only one user can experience what’s being displayed, we created a video to show what an actual user would see in the display shown in the prism.
Script:
Sina arrives at the entrance of a National Park. He visits the ranger station to get a complimentary pair of “TrekGlance”.
(Sina wears glasses)
He hasn’t planned out is hike and is curious what trails are available.
(Signal Diane)
As he walks along, he notices a small blinking tree that signals two potentials paths. By looking in the direction of one of the trail, he is able to pull up key information to help his make his choice.
(Sina looks at the marker (signals information))
The display shows the difficulty, length, and attraction. He decides he doesn’t have time for this path, so he wants to see what the other trail looks like. (Signal Diane)
The basic information is not enough for him to decide. By tapping his glasses, he’s able to access the path preview, and can see a 10s time lapsed video showing the actual terrain for the trail.
(Video Ends (Path Preview))
He decides that the mountain trail is perfect and starts his hike. After 30m, he notices another small path along the way.
(See 3rd marker. (Detour suggestion))
His glasses show a small blinking arrow to indicate that there is a potential detour that he could take. By again tapping the glasses, he can see what sights are available on this path.
(Video ends)
Happy with with he sees. He decides to take the detour. In the end, Sina is satisfied knowing that he has completed all the trails, and seen the major sights along the way.
Materials:
- Glasses
- Wood
- Laser cutting tool
- USB Camera
- Wood
- Display
- Particle serial monitor
- LED display
- Acrylic container to project LED display
- Particle serial monitor
- Augmented reality
- NYAR Tool Kit
- AR markers
- NYAR Tool Kit
Prototyping Process
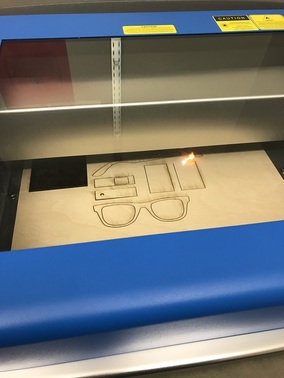
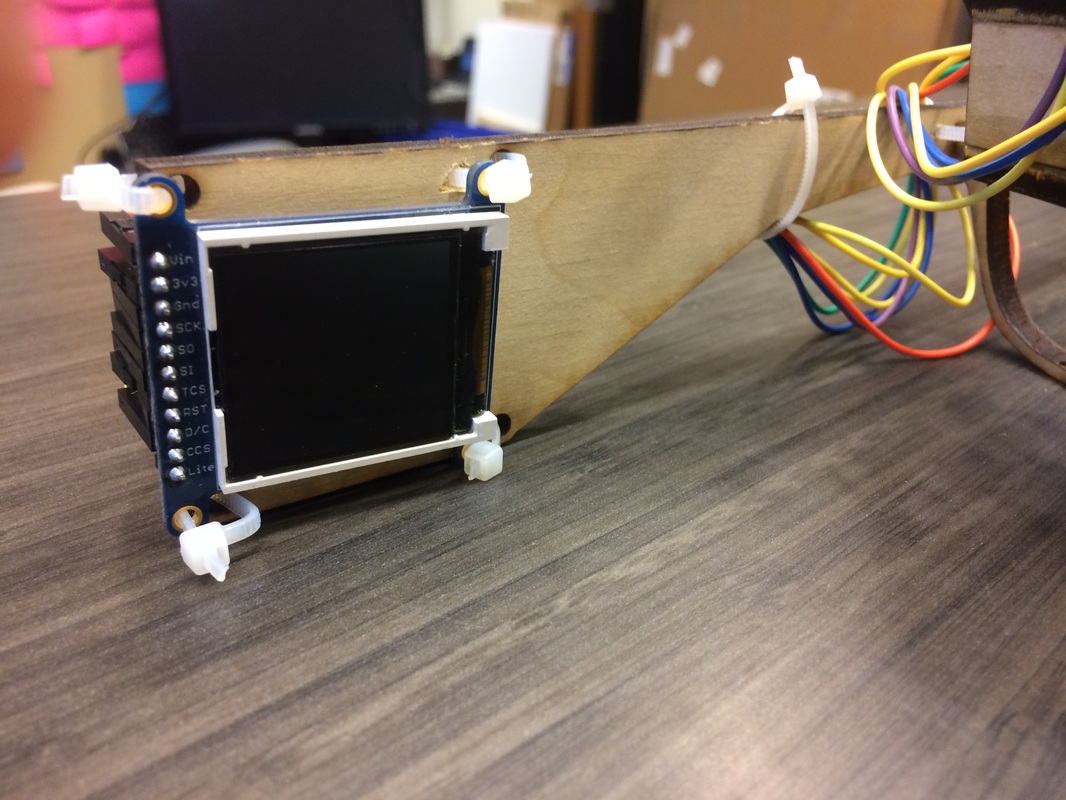
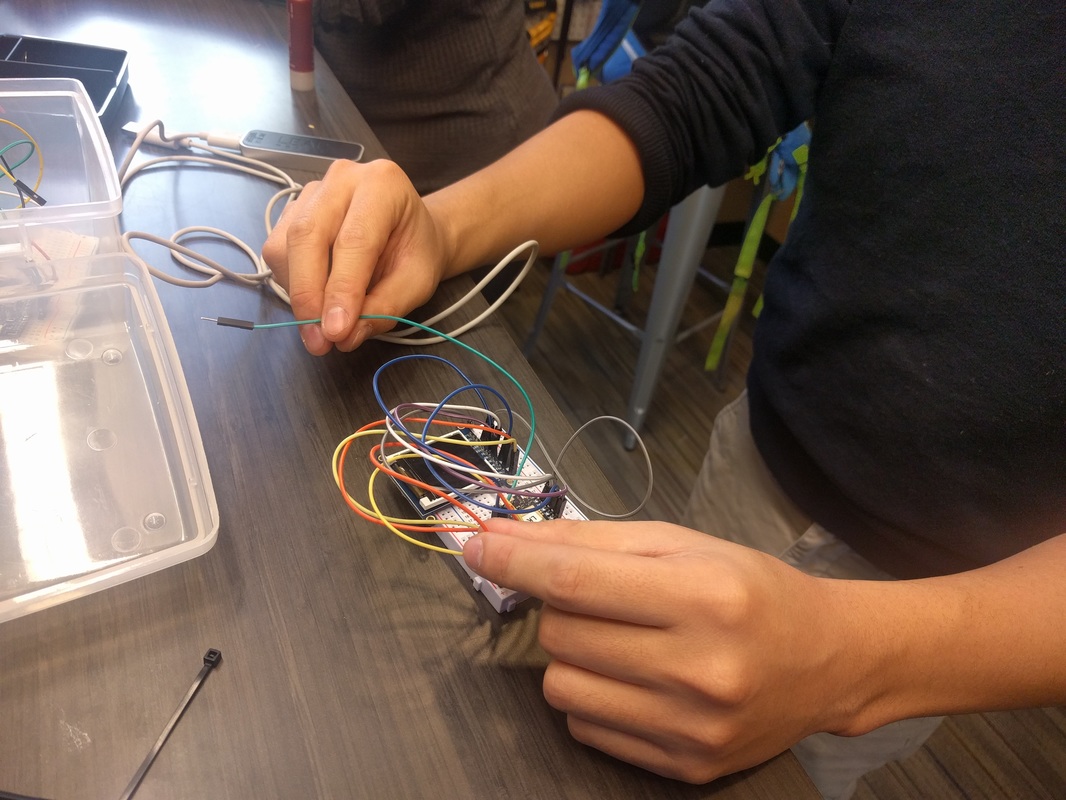
After sketching our prototype idea, we first began by constructing our glasses out of wood using a laser cutting tool. We created a box to hold the camera and attach it to the glasses (click here for a snippet of the laser cutting process). We also attached the LED screen to the right side of the glasses.
|
|
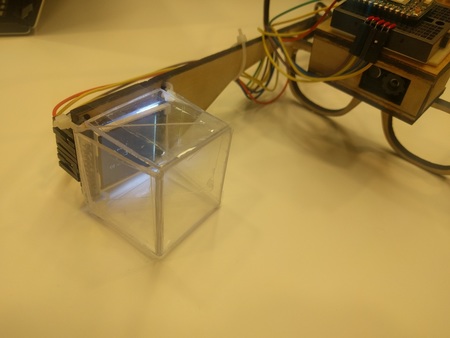
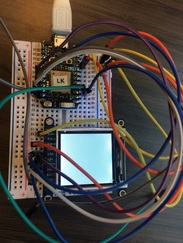
We then built a prism that houses the LED display and attached it the glasses. This was used to project the image from the LED display to the user.
We worked on the Particle code to display information on the LED screen to be shown to the user.
|
|
|
We used Processing to demonstrate augmented reality. We created special AR markers and made videos that display whenever the camera hovers on the AR markers. To view the videos we made, click here.

An example of an AR marker we made
|
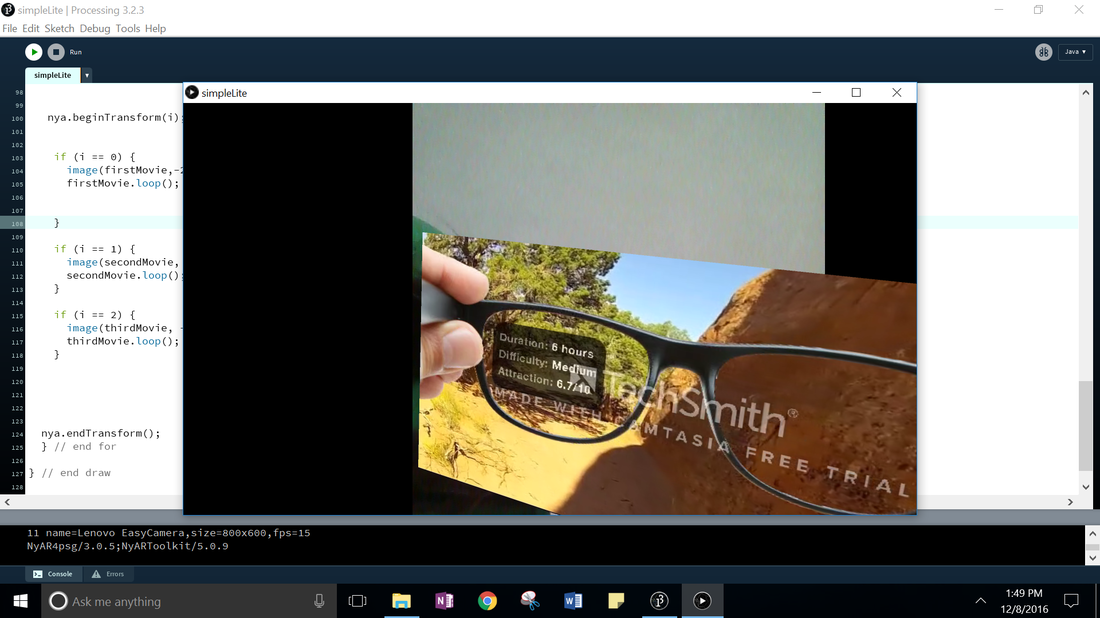
A screenshot of how the video shows up after the camera scans the AR marker
|
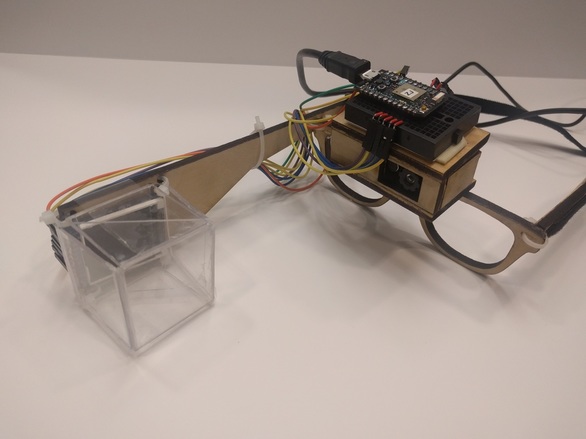
The final product
Demo Experience
The main issue with our demo was that we needed a seamless and smooth performance to get insight. To deliver “information at a glance”, we wanted to show how simple and easy it was to use our product. The main value in adoption would whether the trouble of using and wearing this device outweighed the benefits of getting information quickly. As this tension is similar to many other visual HUDs, the demo needed to be relatively smooth to add to that dialogue. Where our demo was successful was in showing the contextual factors that might make a hiking device more suitable than in other environments. Being able to actually see the path moving forward and getting indicators for other paths seemed to be potential interests for the audience.
Feedback
It was a bit difficult to showcase our demo in front of a larger crowd and bigger room. Some of the demo elements are a bit unreliable. For example, the camera sometimes has a difficult time detecting the AR markers if the lighting is too dark or if the marker is small or too far away The display of the videos was also highly dependent on the placement of the AR markers and the stability of the camera. The videos often bounce around or rotate due to these two factors. Nevertheless, the final prototype was definitely a step up from our original plan of using Google Cardboard and it was rewarding to see all the components come together.
